Tuesday, February 5, 2013

Project #3 Table Proof of Concept


I tried to work out a way to make a surface using brick. I originally wanted to use concrete but the pieces I had in mind were removed before I could get to them. Thus, here I am with brick. It provides an interesting challenge since it doesn't space and yet I need to make a surface out of it. I have to say I'm pretty pleased with the potential of this idea. It needs to be refined, the collar that holds the bars in place will be made out of wood, instead of tape haha. To do this I'll actually have to produce a drawing! I'm really excited and relieved as I've been wondering how drawing will make its way back into this process of working. I don't quite know what it means but none the less I think it's a good sign.


Thursday, January 31, 2013

Project #2 Chair


Build


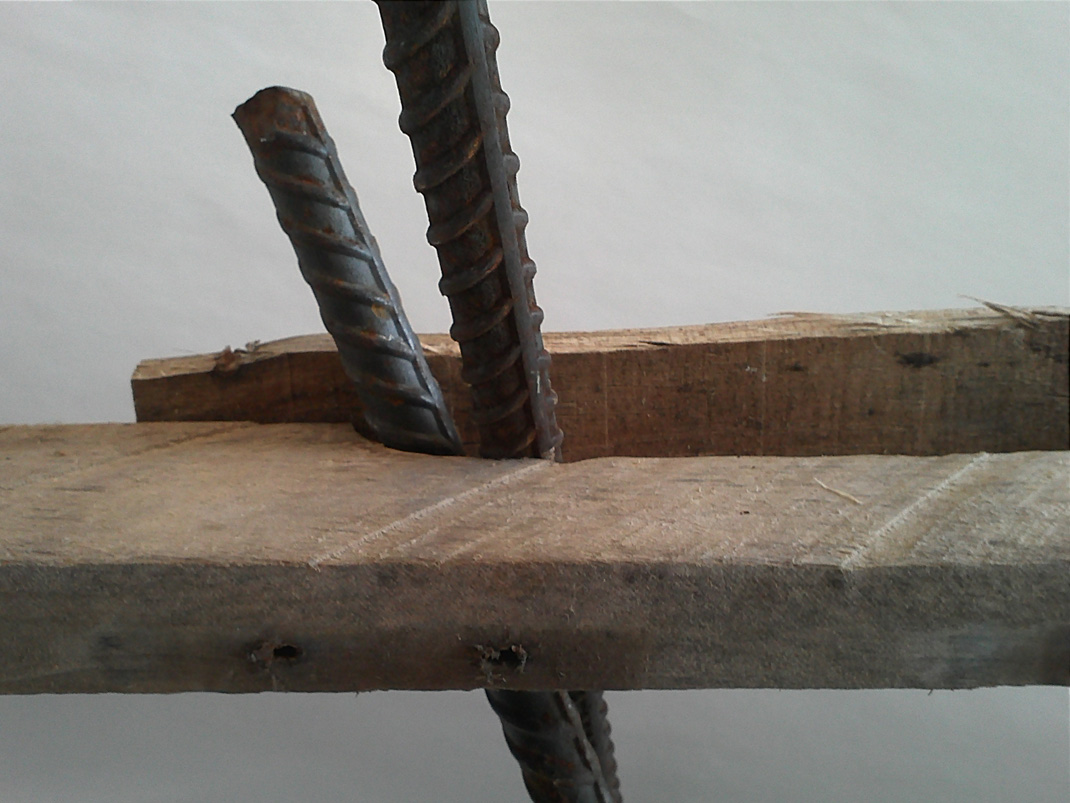
I put together the majority of the chair today. I'm not quite happy with it though. As you can tell by the images there is a twist in the backrest that I haven't yet been able to work out. It partly has to do with the wood being warped but it is also liked to the balancing of the legs and where the seat pan rests on them. This in fact turned out to be a critical portion of the making of this chair. A lot of little tweaking on one leg led to shifts in the others and I'd have to readjust it all again. The tape that you see in the images is to help me reassemble it again so I know where everything goes. What I'll also do the next time I assemble it will be to measure everything out based on what they're already marked at. I would also like to drop the front legs a little bit to make the seat pan more level with the ground but it'll also push the center of gravity away from the back legs and that should make it more stable. I'd also like to make the seat pan larger as it's a bit of a tight fit at the moment. I have an idea to use the shelf pinching idea along with the natural torquing that happening at the seat pan joint to pinch boards that run perpendicular to the orientation of the seat pan boards currently. This will allow me to better control the size of the new seat pan so that it is more comfortable. It'll also be held tighter once someone sits in it due to the re-bar pinching the boards. I'll also have to grind down the feet of the re-bar so that it can slide, spread and more tightly pinch the wood. Currently the feet dig into what they're sitting on rather than trying to splay out.


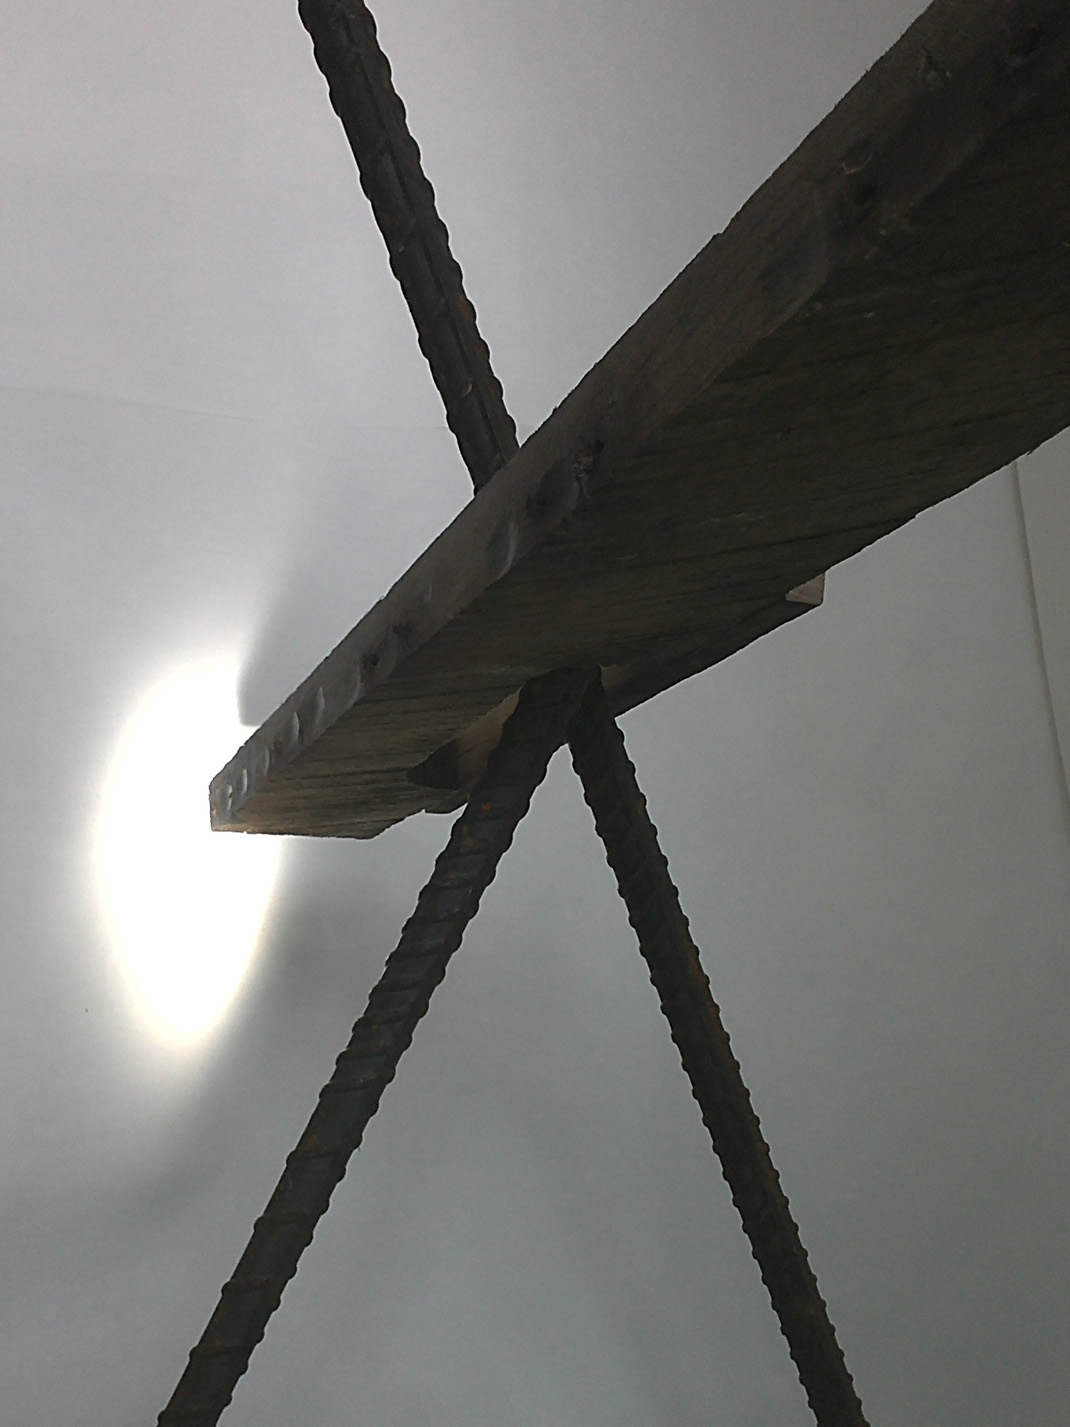
Here is a comparison between how the legs can be set. The seat pan in the left image is obviously set much higher than the right


Saturday, January 26, 2013

Shelf Extrapolations (in progress)

 Build
Original Axon

Drawings of modified shelf, split crosspiece allows for boards to be slid in perpendicularly creating greater shelf depth


Rendering of multiple shelves linked using the split crosspiece model. Also a freestanding iteration.


Texture mapping test rendering


Displacement texture mapping test


Non HDR lighting


CM185T: Painting the Engine

Restore
Brett and I pulled the motor from the frame to better clean them both. We plan on painting the motor black and sanding the edge of the fins so they're a polished silver, gleaming with the reflections off the glossy black finish. We tested it on the valve cover and the alternator cover and they turned out great. the metal accents are already looking great. We'll probably shoot to have the motor fully painted by mid February

Motor with the covers removed

Valve cover all taped and painted, black as the night!

The alternator cover all taped and painted, looking great!


The scarred metal looks great against the pristine new paint
Can't wait to sand the edges of those fins
Gonna be slick!
 *Update* 


We sanded the fins and it's looking incredible. Next step is to polish it up a bit with some super fine grit sandpaper


Sprocket cover has also been painted.


Proof of Concept: Project #2

Build


For my second project my goal is to produce something that will hold a human body. Now, this is obviously not the finished product. I needed to see if the idea I had in mind for using the ridges of the re-bar as grips for the woods to grab onto would work. As you can, it does. Surprisingly so in fact. The quickly tacked bit of scrap wood was the only thing that was preventing me from placing my full body weight on this quick mock-up. The first mock up required an elongated seat pan to generate enough torque to grip the re-bar on its own. This second iteration utilizes two sets of rebar to work against each other, not only providing enough points of contact to keep from toppling over but they actually hold the seat pan suspended above the ground.

I was concerned about the orientation of the re-bar ridges as they cut diagonally across the shaft of the rod. The resolution of this issue resulted not only in a solution to the originally issue but provided two additional refinements. By splaying the legs, re-bar  out it orients the ridges parallel to the edge of the seat pan creating a tight fit. However, it provided the added benefit of increasing the stability of the seat, with the points of the legs being farther from each other, and also pushed the tops of the long re-bar opening up and opportunity to mount a back rest.

Issues to overcome are:

Tightening the pinching slot so the re-bar doesn't slide from side to side
Providing lateral stability possibly through the backrest and a tighter re-bar slot
Constructing a backrest
Losing the excess material on the outside of the seat pan past the re-bar
Strengthening the pinch connection in the wooden material
Consider multiple seating heights, chair vs. stool


Splayed legs for added stability. Notice the tops of the tall rods coming closer together opening the potential for a seat back.


Pinch joint from the front. Notice the angled ribbing on the rebar matching the line of the seat pan due to the splaying of the legs.

Testing the relative strength of the rebar-wood pinch. Notice the elongated seat pan required to generate enough torque to pinch the re-bar


Use of blocking between two boards
Considering notching
Use of existing notching


Honda CM185 Twinstar


Restore


Back in May, Brett Dunnam and I bought a 1978 Honda CM 185 Twinstar for $200. It was to be a project bike, an opportunity for us to learn how these things operate, how they break, and how to fix them. The bike was not running at them time which certainly gave us a lot to work on and a lot to learn from.


working on the two bikes, the blue one is my personal bike.


Brett kept a log of all the work that we performed on the bike thus far and it goes as follows:


05/11/2012
Disassembled carburetor, started clean soak
Removed fenders
Removed airbox cover
05/12/2012
Removed gas tank, emptied fuel
05/14/2012
Reassembled clean carburetor
05/15/2012
Stripped paint on tank and fenders, began sanding
05/16/2012
Tested ignition coil for continuity
Installed new rear shocks
Cleaned new airbox
05/18/2012
Removed seized front brake cable
Finished bondo on tank
Primed tank
05/19/2012
Tested engine compression
115 psi left
118 psi right
05/24/2012
Changed oil
Unwrapped wiring harness to trace faulty connections
05/25/2012
Painted tank (Duplicolor Ford Arctic White)
05/30/2012
Diagnosed bad ignition coil and bad condenser
Cleaned up some wiring
Installed new choke cable
Installed new keyed ignition
05/31/2012
Traced and re-connected wires
Electric start button now functions
Engine kill switch still dead
06/04/2012
Installed new condenser
Installed left exhaust brackets
09/21/2012
Installed front brake cable
Checked and reinstalled rear brake
Attempt to fix kill switch (to no avail)
09/28/2012
Valve Adjustments
New fuel line
Rear wheel adjustment
IT RIDES!


Filthy Carburetors soaking in cleaning solution


Fuel tank: patched, sanded, and primed. Ready for paint
Tank painted and coming along nicely


First start!

First ride!

Video credits to Brett Dunnam


Pallet Pinching

Build
Free pallets available found though a Craigslist ad.
Rented a Home Depot truck to moved the selected pallets. Pallets were chosen for size, condition, constituent pieces, and species of wood, oak being highly prized.
Offloaded seven pallets, five of which I broke down before facilities threw them away.
The pallets had to be cut down in order to be broken apart due to the hardness of the oak and the strength of the nails. I discovered that pallet nails are rifled and extremely difficult to remove.

Board yield.

Nail removal, note the spiral rifling on the removed nails.

A clean board, all the nails on the table came from this one board..


Before and after planing comparison. I planed and sanded only the faces that would be touched during normal use.
Laying out the pieces to discover how they interact, a proof of concept.

Assembled


   Reflection 

I have never enjoyed a design project as much and I enjoyed the design/making of this assembly. Not once was I unhappy or reluctant to be working on this project. I came in earlier and stayed later than I would have otherwise. Every step of the way I was confident and in control while still allowing uncertainty and intuition to help guide the design. It made me wonder why I stuck to the conventions of an architectural education. Certainly they offer a great place to start when you haven't any other ideas and they're convenient. However, for me, why is cardboard and tacky glue the best way to represent a project. I never questioned this and so I never grew beyond it. I think with my final semester at risd I'd like to discover a way of working, or a direction/purpose for my work... I just want to have conviction about something and I feel like I'm the closest I've ever been to that. I think that thinking through/while fabricating is something that is deeply important to me and I haven't allowed myself to embrace and accept that until now. I think this even stems from the fantasy I hold whenever I imagine myself producing works of architecture, which is me building my own home. This never fit with my idea of a professional career, working in or running an office, and so I figured it would be something that I engage outside of the professional realm. However, I don't know that is the best course of action. I think this process of making might have to be how I will professionally produce works of architecture. I imagine this by working in an office to hone my design skills, knowledge of construction, develop contacts, experience the office world, submit projects to design competitions, work on getting licensed, and much more that I'm sure I can't imagine. However, all the while I'll be putting away money to put down on a house. I buy it and completely redesign it, take it apart and reconfigure it just like the pallets when I'm not in the office. Once I'm ready to move on I'd sell/rent it to generate income for the next project and move on and on and on. I think this would afford me circumstances and opportunities that would be simply blissful. 

So, now lets take it back to my desk. What is this thing that has now fixed itself to the edge of my desk, suggesting to me that I can put other things on it? Well, first, it's not a fixed assembly. The bolted connections allow for the whole thing to move and adjust. It most strongly resists downward loading by virtue of the pinching of the crosspiece/backing, relying on the hardness of oak. Lateral loads, parallel to plane of the assembly, are resisted by the weight of the assembly and held objects. In order for the assembly to move in that direction, the weight of the pieces and the downward load must be overcome, raising the assembly and load up and over the pivot point at the bolted connection. Loading perpendicular to the plane of the assembly is by far most weakly resisted by the assembly. It is resisted only by the bolted connection and increased downward loading has an adverse effect on resisting the lateral loading. 

Due to the movable nature of the assembly and reliance on the pinching of material pieces, the assembly can have two positions. The first, collapsed position is what it was designed for but the presence of a second, expanded position offers up an interesting avenue to explore. Extrapolations to follow...